Paper Crafts with Kids: Fun Projects for the Whole Family

Brief Overview of the Benefits of Paper Crafting
Paper crafting is an enjoyable and accessible activity that offers numerous benefits for individuals of all ages.
Engaging in paper crafts helps develop fine motor skills, enhances hand-eye coordination, and fosters creativity and imagination. It also serves as a soothing and stress-relieving hobby, providing a break from screen time and daily pressures.
For children, paper crafting can support cognitive development and encourage problem-solving skills.
Overall, this versatile activity brings joy and fulfillment, making it a favorite pastime for many.
Emphasizing Family Bonding and Creativity
One of the most beautiful aspects of paper crafting is its ability to bring families together. Working on projects as a group allows for meaningful interaction and quality time, strengthening familial bonds. Parents and children can collaborate on creative ideas, share laughter, and celebrate their accomplishments together.
Furthermore, paper crafting encourages individual expression and creativity, allowing each family member to contribute their unique touch to a shared project. By engaging in these artistic endeavors, families create lasting memories and build a foundation of cooperation and mutual support.
Table of Contents
1. Materials Needed
Basic Materials
- Various types of paper (construction paper, cardstock, tissue paper)
- Scissors (safety scissors for younger children)
- Glue sticks or liquid glue
- Tape (clear, double-sided, or masking tape)
- Pencils and erasers
Optional Supplies for Added Creativity
- Markers, colored pencils, or crayons
- Stickers and adhesive gems
- Glitter and glue for sparkle effects
- Ribbons and yarn
- Stamps and ink pads
- Decorative paper punches and craft stamps
- Googly eyes and pom-poms for fun embellishments
2. Project Ideas
1. Paper Animals

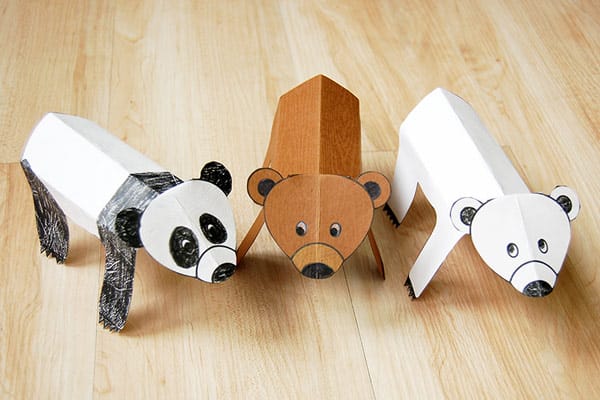
Creating paper animals is an engaging and delightful project for kids and adults alike. Here’s a step-by-step guide to crafting your simple paper animals:
Step-by-Step Guide for Creating Simple Paper Animals
- Choose Your Animal: Decide on the animal you’d like to create. Popular choices include cats, dogs, birds, and fish. Look up simple templates online if you need inspiration.
- Gather Your Materials: Select the type and colors of paper you will need. Use construction paper or cardstock for a sturdy base.
- Draw or Trace the Shapes: Draw or trace the different parts of your animal on paper. For instance, for a cat, you might need a body, head, ears, and tail.
- Cut Out the Shapes: Carefully cut out the shapes using scissors. Younger children should use safety scissors with adult supervision.
- Assemble the Animal: Start by gluing or taping the main body parts together. If you’re making a cat, for example, attach the head to the body, then add the ears and tail.
- Add Details: Use markers, colored pencils, or crayons to add eyes, a nose, a mouth, and any other features. You can also glue on googly eyes and pom-poms for added fun.
Tips for Customizing and Decorating
- Personalize Your Animal: Encourage kids to personalize their paper animals by choosing their favorite colors and adding unique patterns. Spots, stripes, or even glitter can make each creation one-of-a-kind.
- Use Additional Materials: Enhance your paper animals with stickers, gems, or pieces of yarn. For instance, if you’re making a lion, you could use yarn for its mane.
- Create a Habitat: Consider making a background or habitat for your paper animals. Use additional paper to craft trees, water, or even other animals to create a full scene.
- Story Creation: Inspire storytelling by having each child create a unique paper animal and weave them into a shared family narrative. This can be a fun way to blend creativity with imagination.
2. Homemade Greeting Cards

Creating homemade greeting cards is a heartfelt way to show someone you care, and it’s also a wonderful activity that can be enjoyed by all ages. Here’s how to design and craft your personalized greeting cards:
Instructions for Designing and Crafting Personalized Greeting Cards
- Choose Your Card Base: Start with a blank card base. This can be a pre-folded card or a piece of cardstock folded in half. Choose a color that complements your design.
- Plan Your Design: Think about the theme and layout of your card. Sketch your design on a piece of scrap paper to visualize the arrangement of different elements, such as images and text.
- Gather Your Materials: Collect the materials you’ll need, such as colored paper, markers, stickers, stamps, ribbon, and any other embellishments you’d like to use.
- Create Your Front Cover: Begin decorating the front cover of your card. This can include drawing or cutting out shapes, stamping, or gluing on various embellishments. Ensure the design reflects the occasion.
- Add a Message: Write a personalized message inside the card. You can use pens, and markers, or even print and cut out a message from your computer. Be sure to leave enough space for a heartfelt note.
- Finalize with Details: Add any finishing touches, such as doodles, glitter, or additional stickers, to both the front and inside of the card.
Ideas for Different Occasions
- Birthdays: Create a card with festive colors and birthday-themed decorations, such as balloons, cakes, or presents. Add a fun and cheerful message to celebrate the special day.
- Holidays: Design cards that reflect the holiday spirit, such as snowflakes or Christmas trees for the winter holidays, Easter eggs for Easter, or hearts for Valentine’s Day. Customizing the card with holiday-specific phrases adds a special touch.
- Thank-You Cards: Craft a card that expresses gratitude with elegant designs and thoughtful notes. Use gentle colors and patterns, and consider adding phrases like “Thank You” or “Grateful” prominently on the front.
- Get Well Soon: Brighten someone’s day with a card featuring cheerful colors and uplifting messages. Adding images of sunshine, flowers, or smiley faces can help convey your well wishes for a speedy recovery.
- Congratulations: Celebrate achievements with congratulatory cards that feature dynamic designs. Using bold colors and celebratory images like stars, trophies, or graduation caps can add a sense of accomplishment.
3. Paper Flowers

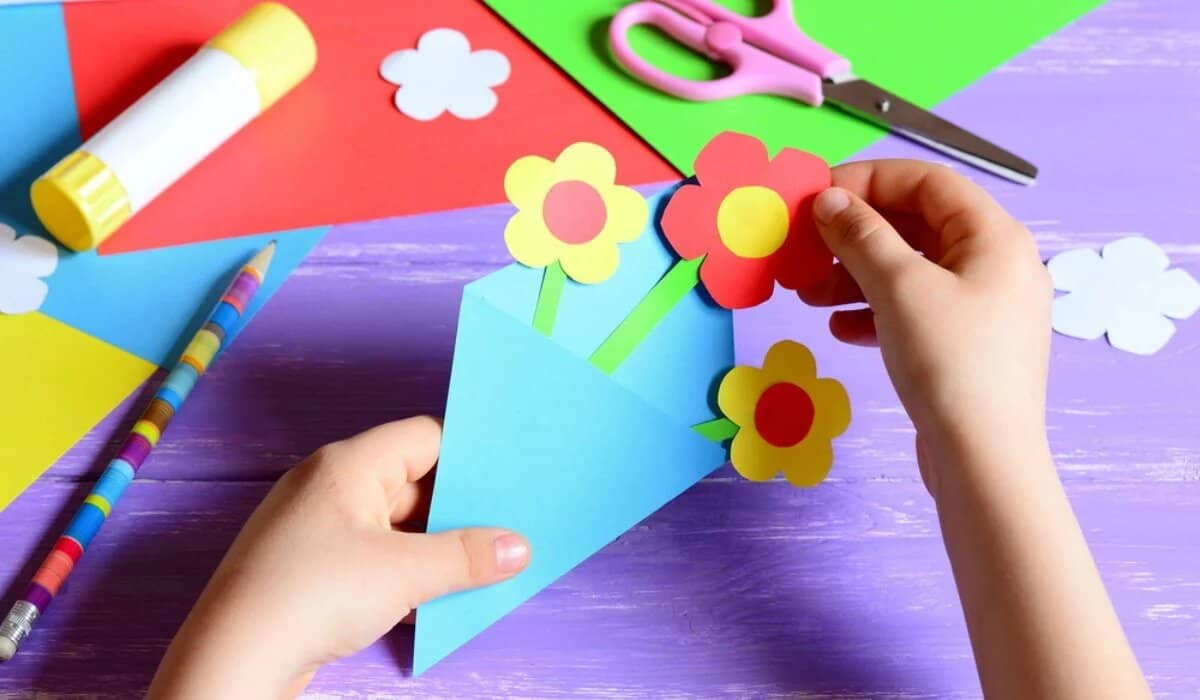
Making paper flowers is a beautiful and versatile craft that can be used to add a touch of elegance to any occasion. This project is perfect for all ages and can be customized in endless ways to suit your style.
Step-by-Step Guide for Creating Paper Flowers
- Select Your Flower Style: Decide on the type of flower you want to create. Popular styles include roses, daisies, tulips, and peonies. Look up tutorials or templates online for guidance.
- Gather Your Materials: You’ll need different colors of paper, scissors, glue, and possibly floral wire and tape if you want your flowers to have stems. Tissue paper or crepe paper works well for delicate flowers, while cardstock is good for sturdier blooms.
- Cut the Petals: Based on your chosen flower style, cut out the petals. You may need multiple layers to give the flower a fuller look. For instance, a rose may require several petal shapes in varying sizes.
- Shape the Petals: Use a pencil, skewer, or your fingers to gently curl the edges of the petals for a more natural appearance.
- Assemble the Flower: Begin attaching the petals around a central point. For roses, start with the smallest petals in the center and gradually add larger petals around them. Glue each petal at the base, layering as you go.
- Create the Stem (Optional): If you want to add a stem, wrap floral wire with green floral tape. Attach the wire to the base of your flower with glue or tape. Alternatively, you can use paper straws or painted wooden sticks.
- Add Leaves and Details: Cut out leaf shapes from green paper and glue them to the stem or base of the flower. Add any other details you’d like, such as glitter or small beads, to enhance the beauty of your flowers.
Suggestions for Using Paper Flowers in Decorations
- Bouquets: Arrange your paper flowers in a vase or tie them together with ribbon to create stunning bouquets for home décor or as gifts.
- Wreaths: Attach paper flowers to a wreath frame for a charming decorative piece that can be hung on doors or walls.
- Table Centerpieces: Place clusters of paper flowers in decorative containers or scatter them around the center of your table for a festive look.
- Gift Wrapping: Use single paper flowers or small bundles to adorn wrapped gifts, adding a personalized and creative touch.
- Wall Art: Create a floral wall art piece by gluing paper flowers to a canvas or arranging them directly on the wall in a pattern or design.
- Party Decorations: Use paper flowers as part of your party décor, whether as part of a photo backdrop, garland, or table setting.
With a bit of creativity and a handful of supplies, you can craft beautiful paper flowers that will brighten any space and occasion.
4. Origami Fun

Origami, the Japanese art of paper folding, is a delightful and engaging craft that can provide hours of enjoyment for both kids and adults. This activity not only enhances creativity and motor skills but also teaches patience and precision.
Before diving into specific projects, it’s essential to familiarize yourself with some basic origami folds. These foundational folds are the building blocks for more complex origami creations.
Introduction to Basic Origami Folds
- Mountain Fold: This is one of the simplest folds, where the paper is folded in half vertically or horizontally, creating a peak resembling a mountain.
- Valley Fold: Essentially the opposite of the Mountain Fold, the paper is folded in half to create a trough, resembling a valley.
- Squash Fold: By partially opening the paper and pressing it flat, you can create a squash fold, which is essential for many intricate designs.
- Inside Reverse Fold: A fold used frequently to create beaks, tails, or other extended parts, where a flap of paper is tucked inside.
- Outside Reverse Fold: Similar to the inside reverse fold, the flap is folded to the outside, and used for various appendages on an origami figure.
Examples of Easy Origami Projects Suitable for Kids
- Paper Crane: A symbol of peace and longevity, this beginner-friendly project involves a series of simple folds to create an elegant crane.
- Origami Boat: Perfect for young beginners, this project involves basic folds and results in a cute little boat that can even float on water.
- Fortune Teller (cootie catcher): A fun and interactive craft, this origami piece can be used to play games and tell fortunes.
- Origami Frog: With just a few folds, kids can create a frog that can jump when pressed down on its back.
- Origami Butterfly: Simple yet elegant, folding a butterfly involves just a few steps and results in a delicate decoration.
These projects are ideal for introducing kids to the world of origami, sparking their interest in this ancient art, and setting the stage for them to tackle more complex designs in the future.
3. Tips for Success for Paper Crafts
Crafting is not just about following steps but also about enjoying the process and embracing creativity. Here are some tips to ensure you get the most out of your crafting experience:
- Take Your Time: Rushing through a project can lead to mistakes. Be patient and enjoy each step.
- Practice Makes Perfect: Especially with origami and intricate crafts, practice is key. Don’t get discouraged if your first few attempts aren’t perfect.
- Gather Quality Materials: Using high-quality paper, scissors, and adhesives can make a significant difference in the outcome of your project.
- Clean Workspace: Keep your workspace tidy and organized. It helps you stay focused and makes the crafting process more enjoyable.
- Learn from Mistakes: Every mistake is a learning opportunity. Review what went wrong and try again.
- Explore Tutorials: There are plenty of tutorials online for various crafts. Don’t hesitate to seek out videos for visual guidance.
Safety Tips When Using Scissors and Other Tools
Safety should always be a priority, especially when using tools like scissors, paper cutters, and glue guns. Here are some safety tips to keep in mind:
- Supervision for Children: Always supervise children when they are using sharp tools.
- Appropriate Tools: Use age-appropriate tools. For younger kids, safety scissors are recommended.
- Cut Away from Your Body: Always direct the cutting blade away from your body and your hands.
- Glues and Adhesives: Some adhesives can be toxic or cause skin irritation. Use them in a well-ventilated area and wash your hands afterward.
- Hot Glue Guns: Handle hot glue guns with care. Ensure the tip is not touched and that it is placed on a safe, heat-resistant surface when not in use.
- Keep Blades Sharp: Dull blades can slip and cause accidents, so ensure your scissors and cutters are sharp.
Encouraging Creativity and Individual Expression
Crafting is an excellent way to express individuality and creativity. Here’s how you can encourage it:
- Improvise and Experiment: Don’t be afraid to deviate from the instructions and experiment. Unique touches often bring out the best in a project.
- Color and Pattern Play: Mix and match different colors and patterns to create something that is uniquely yours.
- Personal Themes: Integrate personal themes or interests into your projects, such as favorite animals, hobbies, or colors.
- Showcase Your Work: Display completed projects around your home or give them as gifts to friends and family. It boosts confidence and encourages further creativity.
- Creative Collaborations: Work on projects with family or friends. Collaborations can spark new ideas and make the crafting process even more enjoyable.
- Incorporate Nature: Use natural elements like leaves, flowers, and twigs to add a unique touch to your projects.
With these tips and precautions, crafting can become a safe, enjoyable, and highly rewarding activity for everyone involved.
Conclusion
In summary, paper crafting with kids offers a wealth of benefits that extend beyond the finished projects themselves. It boosts creativity, enhances fine motor skills, and fosters patience and precision. More than just an art form, paper crafting provides an opportunity for quality bonding time, allowing kids and adults alike to collaborate and learn together.
We invite you to share your completed projects and experiences in the comments below. Whether it’s an impressive paper crane, a fun origami frog, or a colorful cootie catcher, we’d love to see the unique creations that you and your children have made. Your stories and feedback are invaluable in creating a supportive and inspiring community for all crafting enthusiasts. Happy crafting!
Additional Resources
Recommended Books
- “Origami for Kids: 20 Projects to Make” by Mila Bertinetti Montevecchi: This book offers simple projects that kids can tackle, making it an excellent starting point for young crafters.
- “Easy Origami” by John Montroll: Featuring 32 projects, this book provides clear instructions suitable for both beginners and intermediate skill levels.
- “The Complete Book of Origami: Step-by-Step Instructions in Over 1000 Diagrams” by Robert J. Lang: For those looking to dive deeper into origami, this comprehensive guide covers a wide variety of designs for different skill levels.
- “Origami to Astonish and Amuse” by Jeremy Shafer: This book is filled with creatively fun and unique origami projects that go beyond the traditional figures.


